

Agarose gel electrophoresis is an essential biotechnology technique used in research, clinical, and teaching labs across the world every day. Electrophoresis uses electricity and a porous gel matrix to separate different molecules – dyes, nucleic acid, proteins – into discrete zones, or bands, based on the physical properties of the molecule. This includes charge of the molecule, its size, and its shape.
While electrophoresis is very powerful, it’s easy enough to do in the classroom laboratory. One way to introduce electrophoresis to your students is to separate dyes using electrophoresis. These are great “first” electrophoresis experiments for many reasons, but my favorite reason for using dyes as an introductory experiment is that students can visualize the separation of dyes in real time, allowing for a fun exploration of effects of charge on electrophoresis.
As with DNA electrophoresis, dye electrophoresis has a few necessary ingredients for success:
- The dye samples dissolved in a loading solution that includes buffer and glycerol. If the dye was only dissolved in buffer, it would immediately mix with the buffer in the gel chamber. So, we add glycerol to the dye solution to make it heavier, or denser, than electrophoresis buffer.
- Agarose is our medium for separation. We can think about it as a scientific Jell-O. The agarose acts like a strainer, or sieve, helping us to separate molecules by size.
- The electrophoresis buffer we’ll use is a mixture of buffers and salts. There are two reasons to use this buffer instead of water. First, this technique uses electricity to separate the molecules. Water is a poor conductor of electricity. The salts mix with water, which allows for a current to flow. Next, we are working with charged samples, and we want to keep them at a pH that maintains that charge.
- The gel is placed in an electrophoresis chamber and covered with electrophoresis buffer. The chamber is wired at each end with terminals that are connected to leads.
- The leads are plugged into a power supply, which will generate the current that we need to perform the separation.
The first step to running agarose gel electrophoresis is pouring the gel. This step is the equivalent of making our scientific Jell-O mold. The agarose you receive in your kits is a powder, much like Jell-O. We add the powder to our electrophoresis buffer and heat it to boiling so that it melts. As the solution cools, it solidifies, taking the shape of its container. So, we will cast the agarose using a mold so that the gel fits into our chamber. The gel tray has open ends, which allows the current to run through the gel. But, if we tried to pour the agarose solution into this tray, the mixture would leak out the side. To prevent this, we use rubber end caps – no messy tape or complicated clamps. These rubber end caps that we include with our casting trays are fantastic. I’ve run a lot of gels, and this is the only casting system that I’ve used that doesn’t leak. We also need to create wells within the gel where we will load our samples. This is done with a comb. Each tooth on our comb creates an individual well, and we’ll load one sample into each well. Depending on the experiment, we may place the comb in the middle of the gel. This allows for both positively and negatively charged dyes to be properly separated!
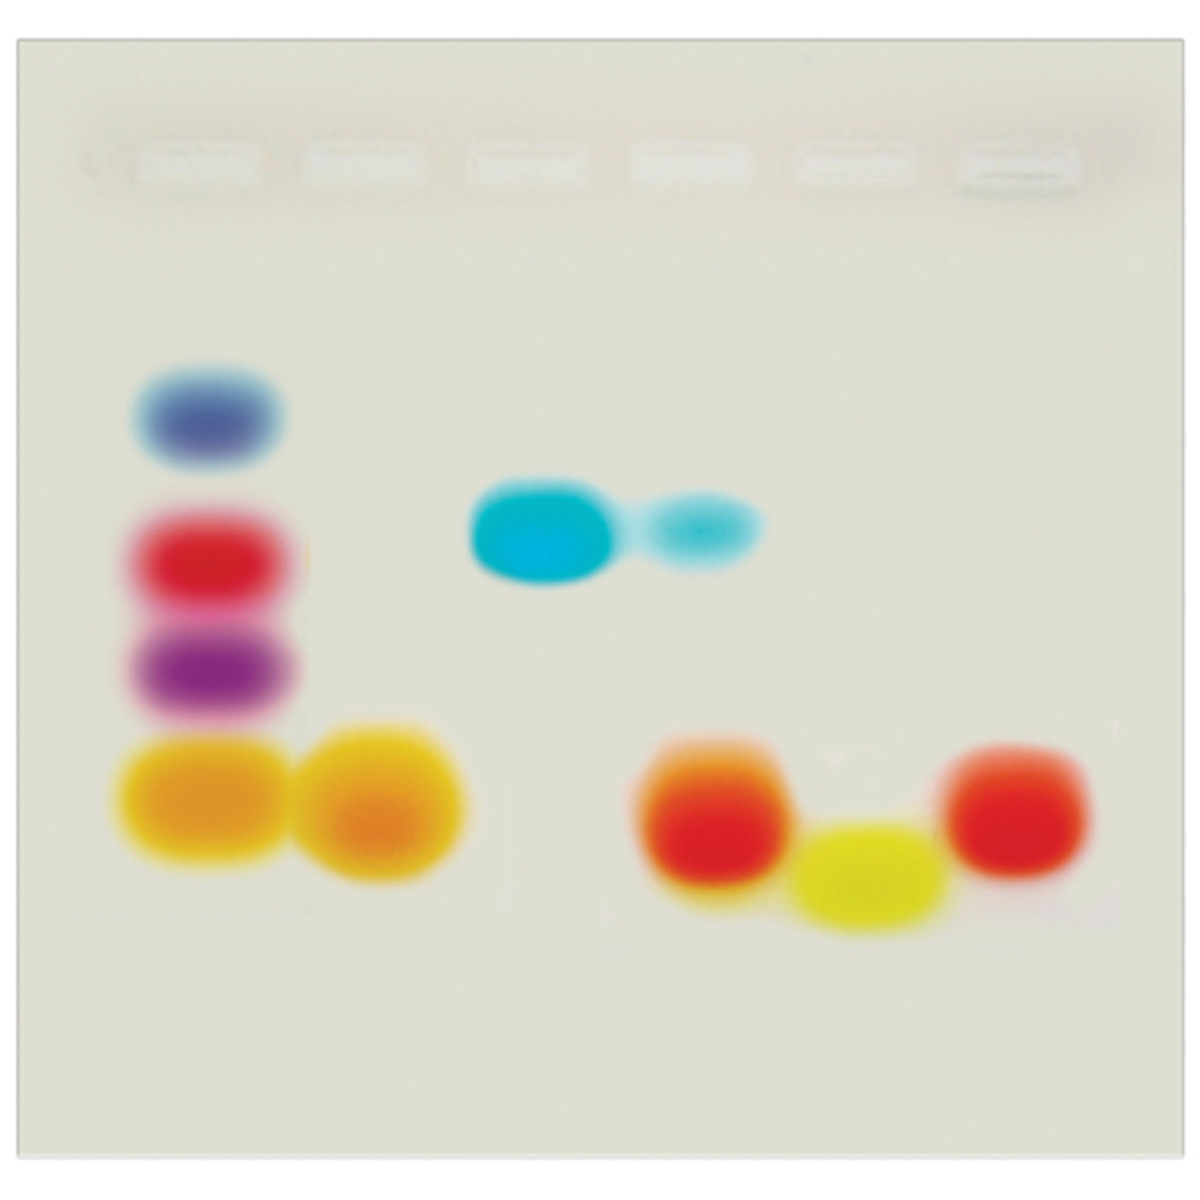
So, what happens when we add the samples to the wells and apply current? First, at the molecular level the gel is full of pores – microscopic little tunnels that go through the gel. These tunnels are going to affect how the different sized molecules separate into bands. Next, the dye molecules have an overall net charge which influences their movement through the gel. Because molecules with different charges travel at different speeds, they become separated and form discrete “bands” within the gel. The combination of the electrical current and the porous gel matrix separates the dye samples into different bands based on their charge.
Importantly, some of the dyes are negatively charged and will move through the gel towards the positive electrode. Dyes with greater net charges will be more strongly drawn to the electrodes. In contrast, positively charged dyes travel to the negative electrode. If you’re used to seeing DNA gels, this is going to look like the sample is running in reverse! But, it’s doing exactly what it should be doing based on its chemical properties.
Furthermore, this experiment covers multiple NGSS disciplinary core ideas and topics as described by the High School Life Science Standards.
Disciplinary Core Ideas:
- An in-depth discussion of the technique of gel electrophoresis addresses PS2, through an exploration of the ways that objects can interact with one another; specifically, the interactions between DNA, the agarose matrix, and the electric field used in electrophoresis to separate molecules by size and charge.
Crosscutting Concepts include:
- Cause and Effect: how differently charged dyes separate in a gel, how different percentages of gel affect the separation of dyes, and how the migration of dyes are influenced by different electrical currents.
- Structure and Function as it relates to dye molecules and the properties of agarose gel matrix that allow for effective separation of biomolecules.
Science and Engineering Practices covered include:
- SEP1: Asking Questions and Defining Problems, through the evaluation of the experimental data and the critical reading provided background information.
- SEP6: Constructing Explanations and Designing Solutions, through the understanding of the properties of dyes and the principles of electrophoresis.
Do you want to learn more about dye electrophoresis? Be sure to view our live streams on this topic!

1 comment
Comments are closed.