

It’s been said that a picture is worth 1000 words, and in the realm of science that often holds true. Whether you’re discussing research articles, scientific magazines, or academic lab reports, an image can be essential in communicating the results of an experiment. In fact, nearly every experiment that Edvotek produces recommends taking a picture of the results to store in a lab notebook or to include in the results section of a lab report. Fortunately, modern cell phones are often the ideal mechanism to record your results! Today, we will look at a few tips and tricks to immortalize your experiments.
Tip 1: Understand how the camera in your phone works best
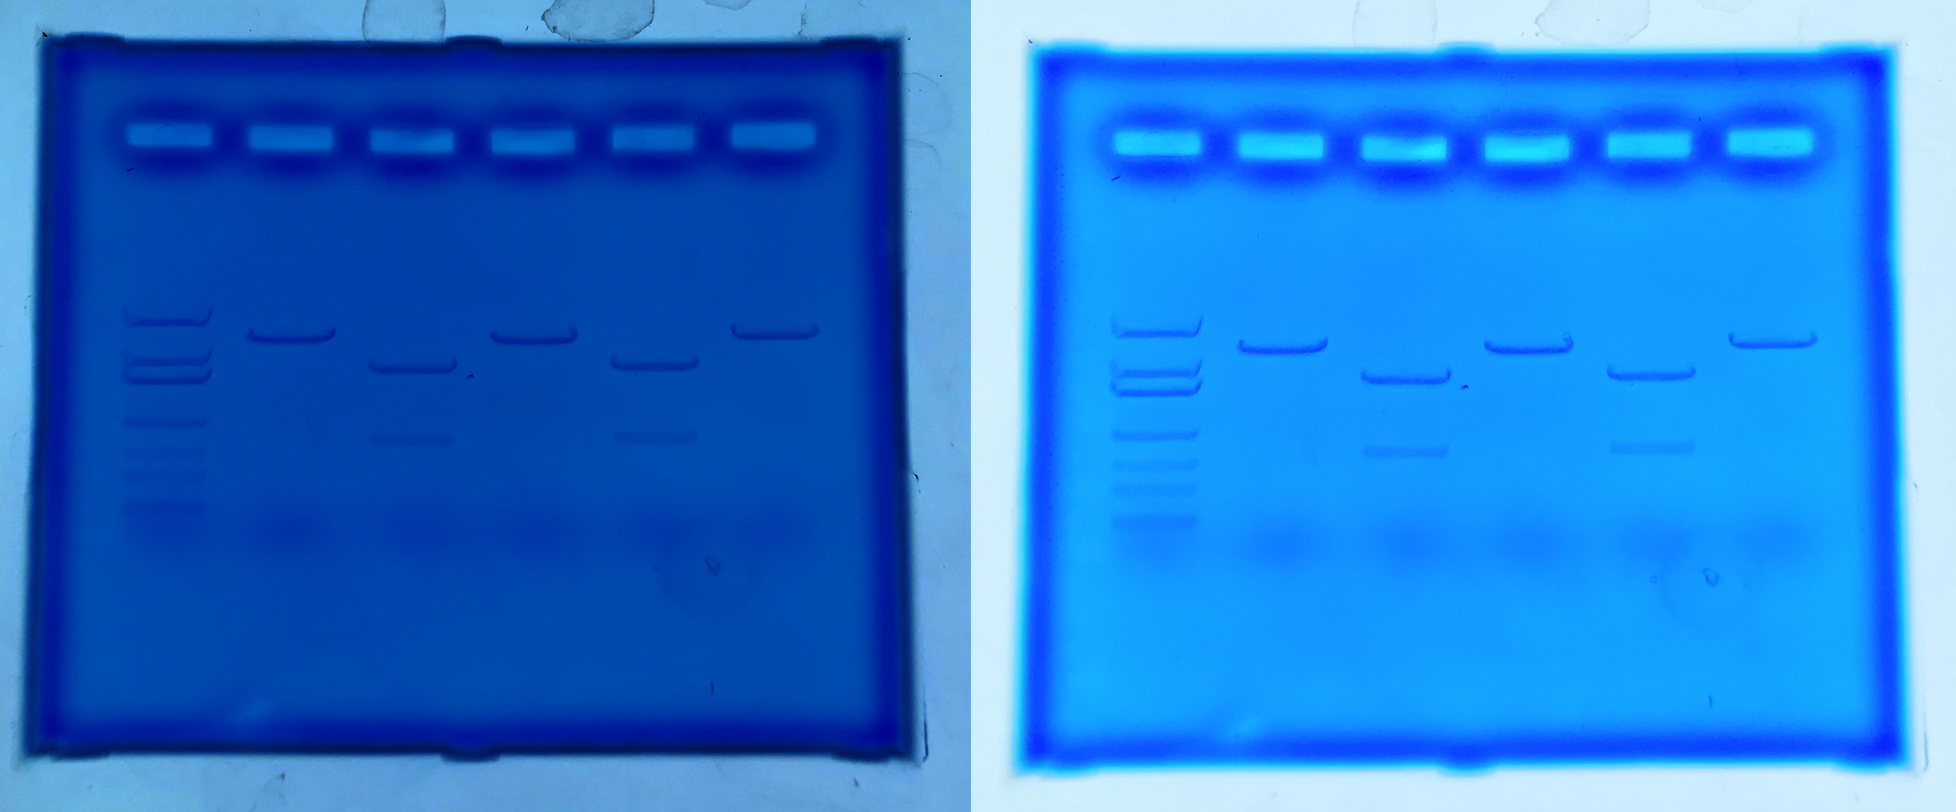
It might seem like common sense, but modern phone cameras function as much through software as they do through the physical camera. Photos are sharpened, color-corrected, de-noised, and manipulated before appearing on screen. In general, this is exactly what we want. However, it can also mean that the image that you record does not always match what you see in person. Most cameras can be adjusted to increase or decrease the exposure, zoom in and out, and correct the color of the final image. We recommend that students take a few moments to explore these features and compare them to the results in person before completing the lab. In fact, it’s easy to take multiple images or the results with different settings to find the best combination.
Tip 2: Find a good background
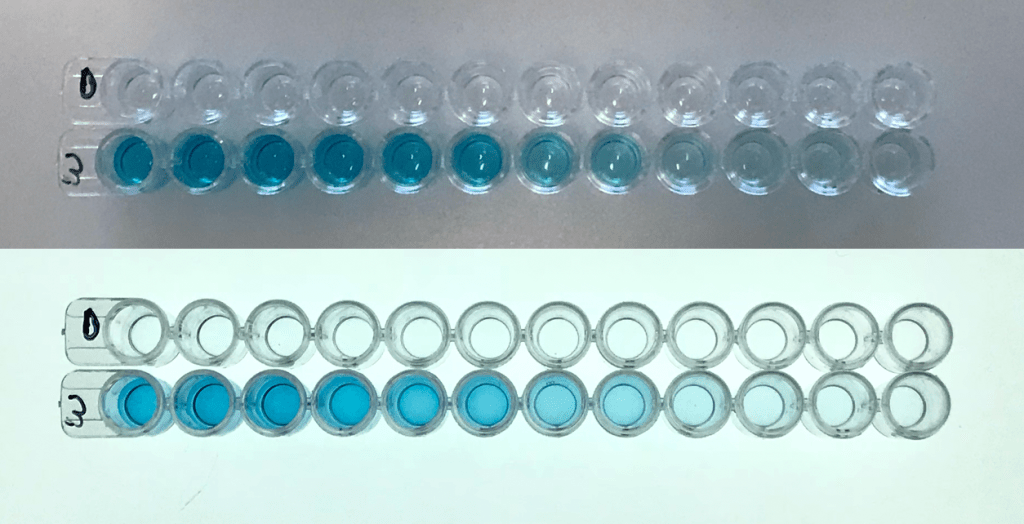
For many experiments, the results will look very different depending on the background that you display them against. This is especially true in experiments where a microtiter plate or petri dish is used. In these cases, we recommend testing different backgrounds to determine the best way to display the results. In addition, backlighting can often make a huge difference in the quality of the image. The pictures below demonstrate results from a blood-typing assay and a quantitative ELISA – the first photo is of the results on a neutral lab bench and then again on a white light transilluminator. In both cases, it’s easy to see how the backlit image changes the appearance of the results.

Tip 3: Avoid glare from overhead lights
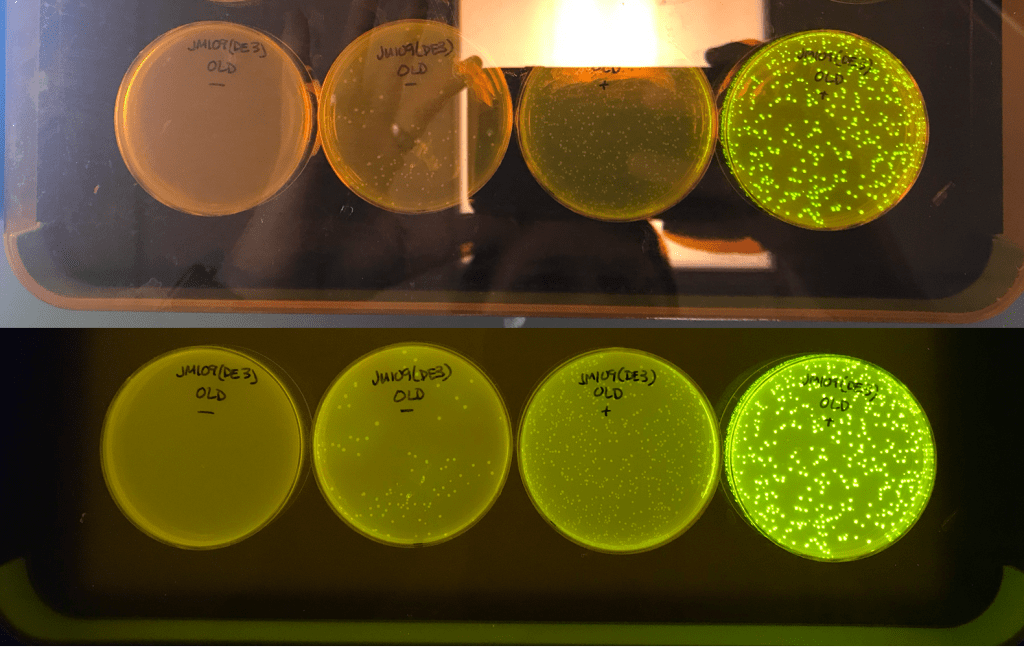
One thing that can very quickly ruin a photo is glare from lights in the room. The worst offender for this tends to be overhead lighting, which reflects off of shiny plastic or wet samples and can mask the results. It can be difficult to avoid overhead glare, but turning off lights or positioning the results in a different location in the room can dramatically improve the resulting image. The pictures to the right demonstrate the impact that overhead lights can have when viewing Green Fluorescent Protein-expressing bacteria. The images were taken with the overhead fluorescent lighting on (top) or after shutting the lights off (bottom). As you can see, the image taken in the dark is much easier to analyze and is more representative of the real-world results.
These are a few of the easiest ways to optimize your lab result images, but there are many more depending on the experiment. Play around with your camera the next time you are in the lab to determine what works best with your phone and the laboratory setup. Don’t forget to follow us on Facebook, Instagram, and other social sites, and let us know if you have other suggestions for capturing the best possible result photos!
